Compiling and Running a JMSL Program using CodeWarrior.
Using CodeWarrior to program in Java takes a little getting used to, but the
hard work has a payoff. Once you understand how it works, creating new projects,
compiling and debugging are much more efficient than with the MRJ tools. Let's
create a CodeWarrior Project for our first JMSL program, called "HelloJMSL.java".
(Caveat: these docs were written using CodeWarrior 4.0; newer versions may differ.)
- Start a new project by opening CodeWarrior and selecting "New..."
in the "File" menu.
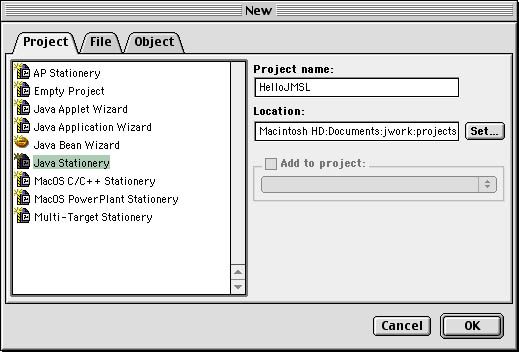
- In the dialog box, select "Java Stationery" and create a name
for your project in the 'Project name' field. In this case we will use HelloJMSL
as the project name, but you can use any name. You can also set the path to
the project in the 'Location' field. It should look something like this:
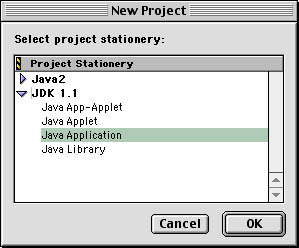
- In the next dialog box choose JDK 1.1 (you may have to expand this option
using the arrow to the left of the text), and in this case we're working on
an application so choose "Java Application." (MRJ for Mac OS 9 and
earlier does not support Java2.)
- A new project will open that contains two folders, "Sources" and
"Classes." If you expand the "Sources" folder you will
see a java source code file called TrivialApplication.java. For our purposes
we don't need this file, but it also won't cause any harm if we leave it.
- Highlight the "Sources" folder by clicking on it. Then go to the
"Project" menu and choose, "Add Files..." Browse to the
HelloJMSL.java file and click OK.
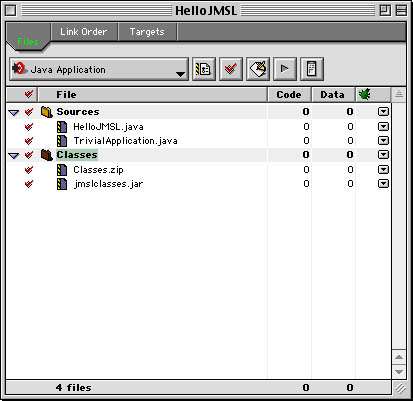
- Highlight the "Classes" folder by clicking on it. Then go to the
"Project" menu and choose, "Add Files..." Browse to the
jmsl.jar file in the JMSL distribution and click OK. This will allow
your program to access the JMSL distribution. At this point, your screen should
look like this (note the name in the screenshot is different. jmsl.jar is correct):
- Now you must let CodeWarrior know a little bit about your Project, which
you do by changing the Project settings. First we will specify which class
to run. Go to the "Edit" menu and choose "Java Application
Settings." In the "Target Settings Panels" column, click on
"Java Target". Under the "Main Class" field, erase TrivialApplication,
and enter "JMSLTestSuite.HelloJMSL". You don't need the '.java'
ending but as you can see you do need the package name "jmsltestsuite" [lower case as of JMSLv103 unlike the screenshot below]preceding the
class name. Click the "Save" button in the lower right corner. It
should look like this:

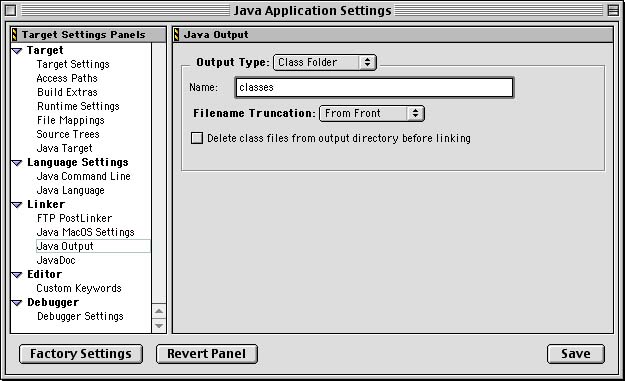
- Now we must change the name of the folder where CodeWarrior places the compiled
class files. This step is not necessary but will help you in publishing your
work on the web. Click on "Java Output" (in the left Column, under
the "Linker" subgroup). Change the "Output Type" to "Class
Folder" and change the "Name" to "classes". This
will now ensure that the compiled class files will be saved in your projects
"classes" folder. It should look like this:
- Important: before you go back to compile and run, click the "Save"
button in the lower right corner. This will save your project settings.
- You should now be able to compile and run the program. Go to the "Project"
menu and choose "Make". This compiles all the files in your project.
- To run the program, go to the "Project" menu and choose "Run."
(Actually, if you skip the "Make" step and jump to "Run",
CodeWarrior will automatically make the project first and then run it.)
Back
This page was created by Jamie Forrest (honksandsirens@yahoo.com) on February
23, 2002 and last modified on February 25, 2002 11:21 AM.